Friday, December 31, 2010

Polymeri Online 31.12.10


Alice (from wonderland) is a designer from St-Petersburg, Russia, she has a wonderful sense of color and her jewelry made me smile, their color combination is beautiful.

DeliciousHobo is addicted to crafting. She (i'm guessing) makes wearable art and her passion for painting, sculpting, and accessories has given birth to her one-of-a-kind jewelry. Many of her pieces are made over the course of several days – clay molding, baking, sometimes sanding and/or painting, sealing, and assembling.

Check out these cool colorful millefiori frogs by Nancy Welch, and her Picassa is full of goodies as well!

creastefy / stefania published a sweet tort cake tutorial, she works with various materials and polymer clay is one of them :)

Last day of 2010 - wishing every one a happy (and healthy) new year!

Saturday, December 25, 2010

Polymeri Online 25.12.10


Biliana is from Sofia, Bulgaria. She is 31 years old illustrator and painter and a graduate from National Academy of Art, Sofia, Bulgaria. Her talent for illustrating works perfectly with polymer clay. In the specific piece (shown here) you can see Alice, a lovely art doll, a one of a kind piece.

Joojoo made cute little trees with sea salt as a "snowy" ground - so cute!

Petalcove has a unique way with roses, her petals are millefiori canes which makes the roses look very interesting. she loves to paint with acrylics, and handcraft jewelry out of polymer clay, sells her work all over Southern California, mostly at art shows and different music events.

ZiZou ArT's photostream has a cool bag collection that you can wear as brooches!

Merry Christmas! :)

Winners of 1st PolyPediaOnline Anniversary and Happy Christmas!


Hope i am catching you in the middle of your holiday celebrations (or getting ready), i am sending everyone happy holidays, best wishes and a wonderful creative new year!

It's just past midnight here in Israel and time to give my own Christmas gifts, i have found a great plugin for blogspot comments so i can number them all and use a random number picker to choose winners - that's a brilliant tool.
83 comments has been posted in the 1st anniversary post, I've got wonderful comments and thank you each and every one of you for taking a moment of your time and filling it out.

These are the winners of the the 10 PolyPediaOnline tutorials (click on the photo above to enlarge), you can check your number in the original post.
Each winner is asked to contact me to my email imishly{at}gmail.com and tell me what is his/her chosen PolyPediaOnline tutorial (out of Vol. 1-16) that he/she would like to receive to his/her email. Please mention your winning number and make sure you include your personal name.

The additional 2 winners are also asked to contact me and send me their personal address to send them the gifts by regular post.

Tomorrow i am back with a PolymeriOnline links post after a short break i did not post.

thank you for celebrating with me, and wishing you all the best :)

Monday, December 13, 2010

Polymeri Online 13.12.10

Alessandro Marco from Italy is a long time cyber-friend, He was one of the first customers in my Etsy shop back in 2007.

He always thought that polymer clay is a magical material and his passion hasn't stopped since.
These days he is working on a Lamp collection made of polymer clay and glass. According to his process, he uses lamps with glass base , He attaches glass tiles to the base, wait a day, clean it all with some oily materials, and then place neon "fimo" or liquid "fimo" between the different pieces of colored glasses.


After that, the lamp will be sent for oven curing in not more than 100/120 Celsius for 20 minutes, when it is cooled it is cleaned up. Marco always gives a name to all his creations before going on sale! :)
Take a look at this Picasa gallery to see more photos -

And one sweet desert -
BlingAndPink's etsy store makes me wanna open the fridge looking for something sweet! :) Her macarons & whip cream looks so real!

Friday, December 10, 2010

PolyPediaOnline 1st Birthday!


Finally the time has come!
This month - December, marks PolyPediaOnline 1st Birthday.
Time really does fly by. It doesn’t feel like a year has passed. This first year was wonderful, thanks to all you polymer clay enthusiastic, wonderful readers and customers! :)
To celebrate, this magnificent year, I’m giving away free gifts! (hey it’s the that time of year :))

Today is the beginning of my Birthday Bash!

Want to know what I’m giving away?
10 lucky winners will win a FREE tutorial of their choice! up to 250$ worth gifts!
The winners will get to choose which tutorial to receive out of vol. 1-16.
1 lucky winner will win a FREE Kit of my new Disc-Chic Jewelry tutorial!
1 lucky winner will win one of my Disc-Chic Necklaces sent to his/her home!

I guess you want to know what you need to do to win these prizes?
Actually it’s very easy- all you need to do is post 2 comments (or more but always in pairs) in this page and answer 2 questions to enter the raffle.

What do you need to comment about?
First, click on the PolyPediaOnline product link and take a look at the 18 tutorials I have published so far.

=> In your 1st comment Choose your favorite tutorial on that page and tell me why is that tutorial in your wish list, OR if you already purchased any of my tutorials - why you like it.

=> In your second comment include something you wish to learn using polymer clay. Something I haven’t covered yet, you can suggest creative ideas, even if you’re not sure that they are possible, but this comment has to be clear and easy to understand. These "wishes" may become my future tutorials!

Comments should be posted on here, in PolymeriOnline Blog by December 24th 2010.
At midnight (my time) I’ll hold the raffles and on Christmas day just before you open your gifts I’ll announce the winners, on my blog.

You are welcomed to post about this giveaway in your facebook wall, twitter, blog, or website and double your chances!

When commenting here, don’t forget to mention where you shared this giveaway (facebook/twitter/other) so i'll know you deserve a double chance in the raffle :)

Let the comments begin! This merry event will last until the 24th of December.

Come and check back on the morning of the 25th of December, the winners names will be posted here!
Thanks again for taking the time to stop by PolyPediaOnline. I really, appreciate it!

Merry commenting and happy holidays to all!

Thursday, December 9, 2010

A quick holidays freebie! make your own polymer clay tree decoration :)


Even though it's still hot & dry in Israel, i am joining the festive atmosphere of upcoming Christmas.

Snow? i don't think I'll see any where i live, but the weather man promised rain this weekend! let's hope for some showers :)

Enjoy this free video on making a Christmas tree decoration using a snowman figure, tree cutter and holiday colors!

Monday, December 6, 2010

thinking of the things I wanted to save

The past week was impossible to bear; Monday morning started with a relatively small fire near my home, the smoke could be seen from my front porch, the smell was very strong and I started thinking about what's going to happen when I’ll be ordered to leave my home.

I was walking around my house, restless, I couldn't do anything useful besides thinking of the things I want to save.
The emergency authorities said there is nothing to worry about at the moment, planes were flying around us. It took a full day for that fire to be put out and that night we went to sleep calmly.

Little did I know, that it won’t last for long. Last Thursday I was terrified. Just before noon I was listening to the radio and I heard that a huge fire has started, only a 15 minute drive from my home.
What does that mean? Do I have to pack? Do I have to think about leaving the house? Again?! What do i take first? The firefighting service declared it as the biggest fire in Israel's history, I decided to pack : My kids, a few albums, my laptop & camera. DH found the perfect timing to be in Los Angeles on a business trip; We all drove to my mother's house, I felt like I have a huge rock on my chest, and all I wanted was to make this disaster go away.

The following days were so awful: roughly 17,000 people were evacuated from their homes. The 82-hour fire claimed the lives of 42 people, burnt dozens of homes, destroyed thousands of acres of land, and raised many difficult questions.

These days left me thinking about the power of nature. I am sure some of you have heard or experienced similar wild fires in your country.... If it wasn't for the great international help we got from so many countries, I am not sure I would be writing this post from my home. I wish I could thank every single nation that helped in this effort. I am sure that when the time comes Israel will be there to help others. Fortunately, nobody thinks about politics when human lives are involved.

So, thank you for being here, reading my post, I really needed to share this, I couldn't ignore everything around me and go on 'business as usual'.

Just before the fire started, I was about to publish a post about a big giveaway I’m having for my 1st anniversary of polypediaonline, but it felt wrong without saying a few words about my personal feelings.

In a few days when life will return to normal, I’ll go live with my planned giveaway, See you soon.

Thursday, December 2, 2010

Polymeri Online 2.12.10

Elaine Robitaille tells about her process of making a face cane and talks about big canes in general, Elaine also became the new editor of Polymer Clay CraftGossip blog - good luck!

tititata96 / Silvia Bordin makes keys look cool! covering them with polymer canes :)

Rijeka from Croatia, started playing with polymer clay 5 years ago and was thrilled. So much possibilities, she could not stop. This is a carriage and beads - pendant for a necklace:

An easy and fun tutorial for making a brooch Pin – Flower Polymer Clay

And...Get ready for the 1st PolyPediaOnline anniversary! details soon :)

Monday, November 29, 2010

Where is that mailman??

Just a quick reminder -
tomorrow (Nov. 30) is the last day
of my "Disc-Chic" pre-order sale!

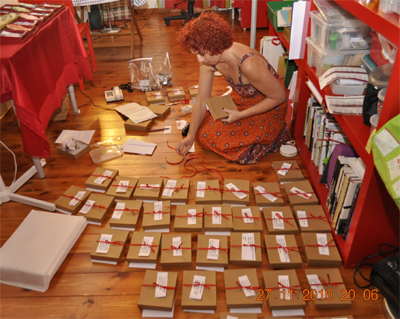
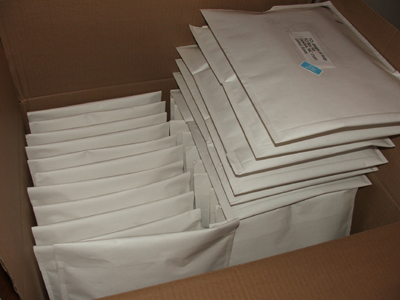
The past weekend was a marathon to send out the ordered kits, I made a special effort to finish everything on time and send them out.

Thank you my dear friends for letting me enjoy wrapping & packaging! Since i am always sending PDF's by emails, I don't get the chance to send REAL stuff by REAL mail :)

So...Don't miss it!
If you want your kit in a special pre-order price sent to your home - hurry up!
The kits left after December 1st will be sold in a much higher price!


Get ready to learn about Disc-Chic Jewelry and enjoy the "WOW" you'll get from every one looking at it, wondering what it is, no one else has it!

Thursday, November 25, 2010

Polymeri Online 25.11.10

Polymer clay and knitted wire pendant by Anna Anpilogova from Belarus, mix media in it's best!

Cristina from Barcelona is assembeling polymer clay figures and papier-mache - so delicate.

Celebration & Garden of millefiori beads! by sps05mel in flickr

One of Encarni hoobies is to design jewelry and polymer clay modeling - brooches, earrings, pendants, mirrors, she also has a gallery of resin jewelry in flickr - take a look! b.t.w - i just LOVE her opening music in her website - Adiamus are one of my favorite too!

Happy Thanksgiving everyone! :)

Thursday, November 18, 2010

Polymeri Online 18.11.10

Look at this! it's so cool! This artist, Jen Dott made this box as his first attempt at making a box out of polymer clay. He made a tissue box where you have to pull the tissue out of the nostril!

These christmas ornaments made me smile, the cute animals on the glass are a wonderful! Doreen Kassel creates her quirky creatures in her NJ studio. She crafts each one out of polymer, and her images have been used for books, magazines, toys, puzzles, greeting cards, Christmas ornaments & textiles. Her Etsy store is full of goodies.

Garden4arts has some wonderful cake toppers in her etsy store, she (i guess) has learned painting and art crafts making since her childhood and consider art a major part of her past, present and future.

Claire Wallis galaxy bangles makes me want to go out and look at the stars... made of polymer clay over a scrap clay armature, backfilled, sanded and buffed.

At first they looked like pills to me, so original! NiQui's art has a unique design, each has it's own charm. i especially liked her a-symmetric necklaces.

Monday, November 15, 2010

Mystery revealed - Disc-Chic Jewelry!

Finally! the Mystery revealed!
Only 50 lucky people will know how to create my one-of-a-kind Disc-Chic jewelry - Be one of them!

All the secrets you wanted to know about my one-of-a-kind Disc-Chic jewelry are offered in a one-of-a-kind kit - tutorial and videos!


Today i am revealing my biggest mysteries, Disc-Chic jewelry.

They were featured in many sites, magazines and books and sold as quickly as they are placed on the table.

Their refreshing concept, luxurious style & fancy look is what made them so appealing and very popular.

I really found them by accident, a friend showed me some metal parts taken apart at a tech lab, he wanted to throw them away for recycling, i immediately told him i will make sure they will recycle in the most respectable way!! in my polymer clay studio! :)

Their “bezel-like” characteristics made them perfect for making beads, being made of metal made them perfect to combine with polymer clay, plus, their "donut-like" flat shape are ideal for stringing them in fun creative ways.

Donut beads are a challenge for stringing because of the need to make them lie flat, so i thought of elegant ways to make them into jewelry - All the necessary information on creating these amazing jewel pieces is gathered in a comprehensive all-levels tutorial and step-by-step videos!

It took me 2 years to build a winning jewel piece!
You can make it within 2 hours tops!!


So...Get ready to learn all the secrets and enjoy the "WOW" you'll get from every one looking at it, no one else has it!


p.s. - This unique offer was never seen before in PolyPediaOnline, THIS is your one opportunity to learn something only 50 people will know... :)

Thursday, November 11, 2010

Polymeri Online 11.11.10

Elise's blog (france) has a great collection of her own polymer clay creations and even wedding invitations and polymer clay hair decorations she made as a bride - wonderful! she tells about herself that she loves every art form - painting, pottery, beads, collage paper towels, candles and recently polymer clay!

Macaroon tutorial on youtube by CheilyStuffz, with a simple trick of using a tooth pick she makes this cute desert out of clay - check her other tutorials, some of them are real cool!

Candy like beads tutorial from "madmoizelle" site -

I found a nice demonstration of glass window art using liquid polymer clay and polymer clay - Designed and presented by Shirley Rufener - although the camera is a bit far, i am sure you can get the general idea -

Saturday, November 6, 2010

Polymeri Online 6.11.10

Celine makes adorable decor made entirely of polymer clay, she is also into mosaics, she loves creating using various materials, and the final piece is a wonderful mix media jewel.

chickiegirlcreations / Janet specializes in unique handmade accessories, currently focusing on hairsticks and polymer clay jewelry, i loved her pendant line!

fliepsiebieps1 / Esther has been creating all sorts of figures (a lot of penguins!) and slowly started doing more and more custom wedding cake toppers. Her toppers travel all over the world :) they are sooo cute!

Martina Mahdavi from Austria, has a wonderful tutorial for an origami ship! so cool! follow the photos for each step, you can move to the next/previous photo by clicking the arrows on the right side of the flickr page.

Thursday, November 4, 2010

Raffle Winners and birthday day :)

I had a great day yesterday!

Started my birthday day at home wishing "happy birthday"wishes to my 14 yrs old daughter, we celebrate our birthdays on the same date :) with all the kissing and hugging i headed to the the train station just to see that i missed the train by 1 minute (!) but nothing will upset me, waited to the next one!
The day was full of fun and productive stuff, i was invited to a very interesting workshop (non polymer) and after that joined a friend to a 6 hours -restaurant-coffee-shopping tour, and when logged into my facebook account, saw hundreds of wishes - this is really heart warming! thank you all!

It's only the start! Next month is the PolyPediaOnline 1st anniversary birthday!! Time really does fly by. Does not feel like it’s been a year! i am planning a wonderful celebration - stay tuned! lot's of FREEBIES and GIFTS right on time for Christmas!

As promised i am posting the raffle winners for my latest PolyPediaOnline tutorial # 17 - Paint on Clay", this is one of my intermediate-advanced tutorials and got wonderful feedbacks on it! all the people who purchased it till my birthday date entered a raffle to win 3 free tutorials!
I used the random name picker.

Here are the winners!
Silke, Starrglow and Nancy!
emails will be sent to you to claim your free prizes :)
Enjoy!

Tuesday, November 2, 2010

Do you have space for more??? Part 3

Final post about ALL the great items we are "moving" to our studio :)

Knitting and Sewing
Knitting needles - Needles are great for rolling, piercing (you can use needles for that purpose) and for making final finishes on beads or covered vessel, just take a knitting needle, make it short or leave it long and use it for your needs. i am using both metal knitting needles and plastic ones in different sizes.
Threads - Stringing! necklaces, bracelets, threads are very useful in your jewelry projects. you can also consider curing a cotton thread if a piece requires it.
Scissors - Cut paper or cut clay (if it's thin enough), i even cut cured liquid clay sheets.
Eyelets - Wonderful for decorations and as an elegant finish to a bead hole similar to Pandora beads.
Fabrics - Jeans, Corduroy - Can be used as part of a design, jewelry, canvas, or as texture. place the fabric on the clay, roll with a roller and the texture is transfered to the clay.
Zippers - These metal parts are also a possibility to use in our work, use them as is or as a part of a design.
Buttons - Use buttons as a part of your design or make your own polymer clay buttons by using real buttons as a template for holes and size.
Ribbons - Great for gift wrapping and also useful for stringing.

watchmaker
The inside parts of watches - steam punk style!

Office stuff
Paper - Used for absorbing the extra plasticizer in clay, and (naturally) for sketching.
Rubber eraser - Can be used as a carving block using carving tools.
White plastic glue - This material is used frequently in my studio, sometimes as a replacement for liquid clay. it is not as strong as liquid clay, if you need a light bond - this is great, also can be used with kids.
Ink - I have never used real ink with clay (ink is too sticky and messing everything up) but it maybe useful when used with care? craft inks are also used with polymer clay.
Markers - Use them on clay, with clay, on paper - some permanent markers work very well with clay.
Color pencils & Crayons - great addition to my studio! these oil based colors work perfectly with clay and can give wonderful results (used them in my last polypediaonline # 17 tut).
Stamps - names? letters? signature? these rubber thingies can be taken to our studio with a smile! use them with ink (dry/wet/paints) or directly on clay!

Glass items
Every oven proof items can be used as a tool or a part of a piece - use glass items for covering with polymer clay, or as vessels and a part of a bigger design - Vases, cups, test tubes (for bases of mezuzah and as a vessel), lamps, plates and the list can go on. from now on, every time you enter a department store, check what can be your future project!

Enjoy!

Thursday, October 28, 2010

PolyPediaOnline - Wave your magic wand and paint on clay! NEW tutorial!

I don't know why many polymer clay artists are intimidated by liquid polymer clay :)

This white, gooey, sticky material is some how too scary to deal with? I keep stock of all liquid polymer clays brands but i use them seldom. why? i don't know! i am more attracted to those vivid clay blocks with their intensive colors :)

BUT! we are missing a world of options over here!

In my new tutorial I am demonstrating how to transfer a drawing or a sketch using color pencils or oil pastels into clay - it can be an artistic sketch, the name of a friend, a
photocopy, your own drawing - anything!
We can paint on clay and use it as our canvas!

My tutorial demonstrates 3 eye catching designs -
a sophisticated symmetric square bracelet (the technique of course can be applied to other designs) OR a barrette using the same technique;

a necklace with chic "pastels-silver leaf" style beads;

a quick "canvas" ring with your own drawing - don't worry, you don't have to be a piccasso for it ;).

Each project has it's own tricks and tips for drawing, building (beads), layering, cutting, attaching and many more.

SO... get your hands a bit sticky :) the best way to understand a new or un-familiar material is to try it out! don't think twice and jump in, you may be surprised where it takes you :)


:)

Polymeri Online 28.10.10

Scott bedford from UK has build an impressive shark mounth container, i had to look close and check his drawings before i understood what i should do! LOL this probably means i am not too good with engeneering? When he was a kid he was obsessed with drawing crazy machines. As he got older he tried to build them.Now, he has kids of his own, and his love of making things has been rekindled – his blog is proof of that.

Maddy Hill’s from Mad Imaginations blog is a papercrafts and fimo mad crafter, i love her sweet polymer clay creations (especially her witch)!

Devil Shoes with airdry clay? why not try it!

and last for today - Stacy Aragon is a nurse. she works at a treatment center for anorexia & bulimia & loves to help others. She has 3 huskie wolf mixes and was told she has a fun spirit. her crazy critters are all hand sculpt polymer clay.

Sunday, October 24, 2010

PolyPediaOnline FREEbie for Halloween!

My daughter is so scared of Spiders! we have lot's of them over here, not inside the house of course, they are in our back yard with special colors and wonderful webs!


I've got a new Free tutorial for the upcoming holiday -Halloween, which i am sure is a grown-ups & children's favorite :)


**************
SPIDERS!
**************
and this time a magical mommy spider with a baby on her back plus, a 5 minutes spidery ring!

Hang those enchanting spiders on your walls, car, or as a magnet on your fridge or wear these bewitching rings :)


If you already Joined PolyPediaOnline, an email is waiting for your with the URL to download the PDF tutorial, no need to register again.
If it's your 1st time - Join the fun!

BIG p.s.
- in about a week i am celebrating my 39th birthday (oh MY, i'm almost 40!)

AND... I am working on a beautiful, new, artistic tutorial....
Get ready for Birthday surprises! more details soon!


have a wonderful holiday with lot's of scarrrrrrry & crafty fun!

Thursday, October 21, 2010

Polymeri Online 21.10.10

spikekid / David Fisher says in his flickr gallery that his polymer clay figures were made over the last 5-6 years. Most of these projects took from between 40 to 60 hours to complete. There are bits of steel and wood involved, more for physical support, than anything else; the bulk of material is Fimo, with a good measure of Sculpey added in.

Not polymer clay but a bit about Wood Carving, same techniques can be adapted to our material as well. Paul Roden and Valerie Lueth are the husband and wife team TUGBOAT PRINTSHOP - Aren't these carving amazing?

I found a couple of cool tutorials in the Russian community, they are very productive over there!
1st is an Almonds beads tutorial

You are welcome to browse some more and look for more goodies, language is not a problem when it comes to polymer clay!

Enjoy the coming weekend!


Monday, October 18, 2010

What else have we "adapted" to our studio? Part 2

After posting about our kitchen stuff gone into the studio, i got a cool comment by one of my blog readers -Kraphti Dez

..."The contents of my kitchen are getting lighter and lighter by month. Something always makes it's way from the kitchen to make a permanent home in the craft room. My creme brulee are perfect for filling with cornstarch and baking beads. And I have fallen in love with baking slightingly concave shapes spoons..."

- it's amazing how we all share the same "problems" :)

I am moving on with the list -

Cleaning stuff, hygiene and makeup
dishes scotch pads - These are ideals for texture, you can use them in all kinds of shapes, sizes, thickness, and they are wonderful. A tip i learned from the great Nan Roche, is to hold your sanding paper on top of a scotch pad, this way the sanding paper is being held by the soft pad and your hand & fingers get a much more comfortable support.

baby wipes - cleaning and more cleaning! clean you clay, your hands, your floor, your pasta machine, these wipes are very useful.

floor polish - although i do not use floor polish as a finish to my work, "Future" Floor Polish is a great example of this. Some people like to dip their beads in finishing liquids, or you can use a brush and apply few layers until you get the effect you want. This material is an alternative to gloss and lacquer.

Tooth brush - another texturing tool (and cleans as well!)

Makeup brushes - I have a store nearby that sells cheap makeup brushes that are soft and nice, suitable for applying paint, lacquar, gloss or resin.

Makeup powders - those are great as metalic/matt effects on stamped clay, i use to be a makeup artist and have tons of those powders, they are perfect for clay and can be a wonderful substitute to the mica powders (see photo).

Lotion - a good material we can use with very dry clay, just add a small amount of lotion to your dry clay and keep conditioning it, it helps softening the material.

Manicure sponges - the manicure sponges have 2 main purposes - 1st is for sanding in medium-coarse grit and 2nd is texturing.

Manicure stickers - nails stickers are a great decoration for cured polymer clay designs - flowers, butterflies, dots, etc. Don't cure them, the plastic in them won't survive the heat of the oven. same with plastic rhinestones.

Stylus - this tool is awesome, making these cute dots on your clay whether it is cured or raw, i love "dotting" my clay, you can also use acrylic paints to add dots after cure.

Vaseline or other Petroleum Jelly - same use as lotion.

Talcum - very useful release agent, brush your stamps, texture sheets for easy releasing. you can also use cornflower for the same purpose. Be careful not to inhale talcum, it's not healthy.

Dental Clinic
Syringe - although this tool is not something i want to meet in real life, it is great for measuring material, especially when working with resin which has to be weighted carefully. i know some people use them as extruders, but i haven't try that :)

Dental tools for sculpturing - these tools are perfect for sculpturing and miniatures. if you are into those subjects - it's a must have.

Molding materials - haven't try those either but i heard from one of my students which is a dentist that the dental mold works great for polymer clay as well.

Carpentry, Construction
Sanding paper - sanding paper in all kinds of grits are welcome in our studio - coarse? use it for texture. fine? use it for sanding. they are fun to use, cheap and make a beautiful finish on your back pieces.

Lathe machines - Never used those but i saw the magic done with them by grant diffendaffer.

Tool boxes - working tools for your DH? no, they can be a great storage box for US! i have tons of boxes from the hardware store used to store my canes, tools, cutters etc!

Ceramic tiles - take all the leftovers from your home renovation (or ask the neighbor for some tiles) and use them as working surface. they are cleaned easily and can be cured in the oven.

Mesh - this is one of my favorites! metal mesh can be cured so it can be used as an addition to our clay designs, as armature and many other uses.

Screws/Nails etc - steam punk style? these oven proof tools and materials are a cool decoration for your work. they are also useful for texturing, piercing, and just for fun.

Pliers - it was supposed to be the other way around but i always find MY pliers at my DH tool box! these tools are a must for wire work, jewelry making and any studio needs a couple of these.

Silicone Gun - mostly used as an assistant to older polymer clay extruders (scroll down on this page) if you don't have the green Makin's extruder, you may want to use the silicone extruder as an aid.

More in the next post!

Friday, October 15, 2010

Whole Kitchen in our studio? - part 1

My real kitchen

Our polymer clay studio is a collection of all disciplines all together :) we collect everything that is usable to our studio - don't we? Whenever i go somewhere i think about my art - every visit to the store, every walk to the park, every stone or leaf on the tree, every tour around the house - i always find something and say - "hey! This can be adapted to my studio!"

Recently the girls at the Israeli forum made a long list of all materials and tools we borrowed from other uses, professions and fields and adapted them to our domain.
I am sure the list is not full and there are many more materials we haven't thought about that can be a great addition to our polymer clay art - you are invited to add yours too!

So let's begin!

Let’s start with the kitchen (that's my real kitchen in that photo!) -
what do we take out of the drawers and shelves? :)

1st - the Oven! all of us use the oven to cure polymer clay, some of us cure in the kitchen oven (don't forget to ventilate well after use) or bought a dedicated oven for the use of polymer clay.

Pasta Machine - i never made fresh pasta myself and this tool never met my kitchen, but some of you may use it for real pasta and then it was moved gracefully to our studio.

Food Processor - this is a great tool of you can get a second one for your studio - no more mixing my hands, just add some of this. Some of that, turn “on” the button, and you have a special polymer clay mix ready to use.

Cookie cutters - my favorite tools ever, these fun tools are easy to find, usually not very expensive, you can use either the simple plastic ones of the heavy duty stainless steel ones, but as always, don't mix food and polymer clay tools together, "borrow" them to your studio and buy new ones for baking.

Roller - Plastic or metal rollers are great, wood rollers wouldn't work so well with the clay (stick), this tool is also a must have in your studio.

Baking paper / parchment paper / wax paper - i am not sure this is the right word in English, but i use this paper a lot in my studio. Place clay on it, store sheets between 2 pages, cure flat objects on it, this paper is wonderful and has many uses in polymer clay work.

Aluminum paper - due to this material durability in heat, this makes it ideal to work with polymer clay and deal with the heat of curing. You can use it as a base armature for your creations, support for designs and many more.

Peeler - we had to take this tool to our studio to peel some clay! the sharp blades are ideal to peel slices of clay, similar to the peeler used by dan cormier, make sure your peeler is sharp enough to do the work and that it is stainless steel so it won't rust.

Tooth picks and shish-kebab skewers - these disposable tools are "multiple-able" in my studio! Great for piercing your beads and used for making all kind of special effects on your clay, can be cured easily and ideal for handling. Every skewer is used many times till it's thrown to the trash - only after it is dirty and worn out.

Corn flower - kitchen ingredient that was adapted to our studio - use it as a release agent, smoothing material and why not make a pudding as a snack :) just kidding!

Salt - another kitchen ingredient we can use for special effects on clay. The salt will be washed with water after curing and will dissolve and leave the clay stamped with the special texture similar to lava effect. Other spices can be used as inclusions to your clay!

Saran plastic wrap - a great material which is also a tool. use this one for wrapping clay (not all plastic wraps are compatible with clay, but Saran™ with Cling does not interact), and it is great for making "beveled" creations.

Plastic wrap - another great way to store our clay! Plastic wrap works great to help protect clay from getting dirty and absorbing dust. However, be careful which brand you choose. Certain types contain plasticizers that can chemically bond with the clay and cause your clay to go brittle or rubbery. Check the words, "Does Not Contain Plasticizers." to be certain which is best for storing your clay. Plastic boxes are good for storing as well, you must make sure that the type of plastic used to make the storage box, is actually compatible with the clay, but you can always place your clay inside the box on wax paper.

Grater - texture tool! great for texturing for beads, especially on the rough side of it!

If you look carefully you'll see that every kitchen tool can contribute something to our clay work, it's a great opportunity to see what we don't need inside those drawers and move them to our "packed anyway" studio drawers :))

That's it for Kitchen materials, next post soon with more tools and materials from other fields.

Do you have other tools and materials from the kitchen? Add it to the list in your comment!

Thursday, October 7, 2010

Polymeri Online 7.10.10

Millefiori fun! that is what i thought when i saw Cathy Harm's etsy store: Hair sets, album covers, pens, key ring compartment boxes and lot's of cool polymer clay gifts!

Lorraine Seibold from British Columbia, Canada, is working with silver sterling and polymer clay to make unique looking jewellry that looks so peaceful! little dots and circles that make the design flowing and eye catching.

Rossella Puoti from Italy is graduated in Organizational Psychology but during her time of inactivity she moved back to her passion: art. Her polymer clay art is so cheerful and colorful!

Helena is also having fun with retro patterns - she used these square/round looking layered canes in all kind of designs and the result is always beautiful!

p.s. - reminder - my special sale of the October triple is about to expire soon! if you wanted to get 3 tutorials & learn how to make unique looking beads for just 16$ per tutorial, this is your chance :)

Monday, October 4, 2010

PolyPediaOnline - Are you ready for some doming, mesh and waves?

I'm so excited to introduce you to October's classes and tutorials featuring fantastic designs and techniques - 3 NEW tutorials this month
Learn the secrets of:
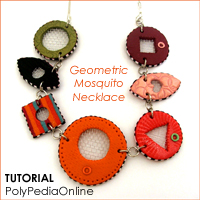
"Geometric Mosquito Necklace"
"Mystifying Floral Brooch" &
"The Wavy cuff - 3 versions"


"Geometric Mosquito Necklace"
Have you ever found yourself wandering around at stores and looking for items or tools that can suit your polymer clay art?
I do!

One day I was looking for something to help me create a thin but strong polymer clay bead so I thought – why not use some kind of net/mesh for extra strengthening and at the same time gives an elegant look. I looked for something delicate, thin, flexible, ovenproof and not expensive & I found the Mosquito mesh. Here (in Israel), almost every house cover it's windows with this net to protect against Mosquitoes.

My recent tutorial "Geometric Mosquito Necklace" is using the same mesh to create an innovative unique look of flat beads.
These flat beads can be made using all kinds of clays, colors, textures, powders, paints, skinner blends and any thing you can think of. Their beauty is in their uniqueness, The "mesh-clay" combination gives them a very elegant and stylish look.
"Mystifying Floral Brooch"
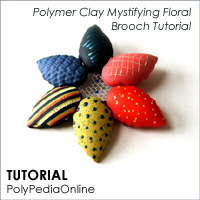
While i was playing with the mesh i came up with a design of a floral brooch with domed beads.
I didn't want to use the traditional curing way on light bulb so i used a different technique. These beads are half domed, half flat and can be easily placed on any flat base - as beads on string, on a bag or jacket.

The Mystifying Floral Brooch has a beautiful combination of mesh-beads, special bumpy dots, plus you will learn how to make half domed beads.


"The Wavy cuff - 3 versions"
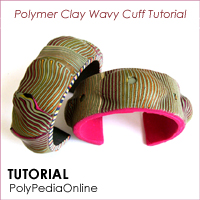
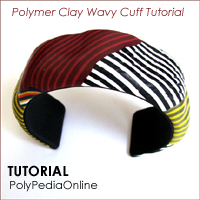
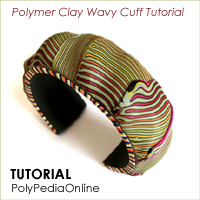
Last tutorial offered are 3 cuffs versions which are a nice variation of both the floral brooch tutorial and the striped hollow bracelet tutorial - The Wavy cuffs tutorial is using domed hollow forms with millefiori to create this appealing design.

The 3 tutorials are offered for a special price!

To discover what it is -
CLICK HERE --->
http://www.polypediaonline.com/133688/october-new-tutorials

I recommend you do it now because this special deal will be removed within days..

Keep up claying and have a wonderful day!

Thursday, September 23, 2010

I'm Back and some new Polymeri Online

I'm back after almost 2 weeks i didn't post, now i feel a bit better.

Just after Rosh Hashana holiday when getting back from my son's swim class we were both hit in a traffic accident, thanks god we are ok, nothing broken, only pains and bruises that hopefully will heal soon.
Nothing prepares you to this experience, even when seeing and hearing about it over and over on TV and radio, I didn't understand what this means.
I lost my consciousness, my head was hit, parts of those moments i don't remember very well. Funny, but the only thing i was thinking about before i got into the CT scan is my artistic skills when checking my memory. Sounds totally out of place but i did think of my clay that moment. I know it's not a joke & i am not a religious person, but i feel that someone, up there, was keeping us safe and saved us that day. The car was totally ruined.

So, again, sorry for being away, i promise to be back on track and in my dear studio,
i am sure that this is the best cure for me.

I got some nice links for you this week, Just look at these beautiful mushrooms and tiny creatures in Cade's store, made of polymer clay, paper clay, sculpey & stamps

another wonderful crafted and customizable scented jewelry made by tinyhands, sweets and more sweets!

Sylvia's blog is full of great projects and a demo on how to twist a earring wire.

take care and please, drive carefully.

Friday, September 10, 2010

Polymeri Online 10.9.10

Just a quick polymeri online while i am on a short vacation in beautiful city Eilat on Rosh Hashana holiday, weather is hot and sunny, kids are at the swimming pool and snorkeling, and everything is wonderful :)

I was touring in the shops, i saw all kind of wonderful Pandora style beads, usually made of glass, these beads are great and so elegant.
Then i saw Dani's polymer clay beads and loved them, She is from Australia and her beads are sold on "madeit" site and in Etsy too.

and one more... Julie Eakes posted about the new cane slicer by Carol Simmons, all we can is drool more and more, wishing for a machine like that to be a part of our studio, i know everyone will love to have it but the people most need it are the ones working with huge canes. I also saw her presentation in Synergy, and indeed her process for making her pendants and kaleidoscoping is wonderful. check her thin thin slicing...

Tuesday, September 7, 2010

Shana Tova!

Rosh Hashanah in the jewish tradition is the "head of the year, or the "start" of a new year, one of the foods that is most commonly eaten on Rosh Hashanah are apples dipped in honey, for this reason people like the holiday symbols and this is a good opportunity to create something nice with apples, honey, bees or similar related themes.

In these 2 videos i want to show you how to make a nice apple magnet using an apple shaped cookie cutter and a rubber stamp decorated with a smiley bee. This magnet will look nice on your fridge, dish washer and even on your car door! let's wish every one happy holidays! - Hag Sameach (in hebrew)!


Shana Tova to all my friends and a great year to come!

Sunday, September 5, 2010

Fun with Beads!

When i met Ronna Sarvas Weltman in the Feb 2010 CFCF event, i was very happy i can take a class with her, she was teaching how to make one of her stunning rings.


Recently, I received her 2 new dvd's and i enjoyed watching them very much.
In her 1st dvd - Mixed-Media: How to Make Polymer Clay Beads, Ronna is covering all the basics about conditioning and making her known beads, if you saw her book you would probably know what i am talking about, her unique style is shown in a friendly video where you can see not only photos, it's the working hands, movements and special tricks. I liked her tip about curing round beads!
in the video you will master beads shaping, curing, and texturing.

In her 2nd dvd - Metalwork: How to Shape, Texture, and Antique Wireworked Jewelry, Ronna shows step by step how to add depth and sophistication to simple wire jewelry - antiquing basics , jewelry-making skills such as making your own clasps and a fabulous ring in only 5 minutes!

This is great! thank you Ronna :)

Thursday, September 2, 2010

Polymeri Online 2.9.10

I don't know if you noticed, but facebook became a new source of beautiful art and useful links, i find myself wandering in galleries with lot's of beautiful items - what a joy!


1st from facebook is my dear friend Mira Krispil, she has posted some of her beautiful "Pinkaso" art, Mira (also known by the name "pinki") was my companion at my last trip to US and is also the manager of the Israeli guild. She has this wonderful ability to use colors and millefiori as if they were canvas and paint (picasso!) her gallery is full of wonderful pieces and the joy and optimism is seen every design.
flickr gallery, if you haven't yet read about her touching story, take a look at her flickr profile -http://www.flickr.com/photos/mirakris

Another artist i found in facebook is Carie Schoen, she is making custom pieces sculpting tools for miniature work

daniela duva from Italy, is combining polymer clay with wire and her elegant pieces were featured in PCD exactly a year ago.

Olimpia Corvino is also an italian artist i have found in facebook, she is designing jewelry, beads, working with polymer clay (cernit), wire and her rich, chic designs play a wonderful game of color and shape.

I guess i will be touring inside facebook further more and certain to find lot of treasures :)

Monday, August 30, 2010

Summer TRIO!

The countdown is really on now as there are only 2 more days left of summer vacation, and then the kids are back to school. They're not too happy about it, but I sure am *LOL* While it's been wonderful having them home, it's been chaotic as well :)

It is also the "end of the summer", but that doesn’t mean all of the fun has to stop :)
the weather is still hot every where on the planet, so the good news is that summer will stay for a while. In Israel it usually leaves at my birthday month (November) so we have a long wait!

While i was thinking for "end of summer" tutorials ideas, my daghter & myself went to buy her school equipment, getting ready for next year (she is 14).
We walked around, when suddenly her old Havaianas flip-flops came apart and we started laughing, "what should i do now, mom? walk barefoot?" she asked me, so we added a new pair of Havaianas to our list and i got a nice reminder about my popular flip-flops beads i used to make - they are always a big hit, making them with adults and children - why not write a tutorial about it?

So, just before the summer officially ends and the cooler weather comes our way, let's celebrate this time with an event that’s gonna leave a warm reminder -
Summer Trio is for you! fun for everyone!


I have come up with 3 New PolyPediaOnline Summer Classes -
1 - 3 variations of my Fashionable (and comfortable!) flip flop beads! to be used as charms for cell phones, keychains, earrings, pendants and so much more!
2 - Round, shiny and colorful beach ball beads! you will certainly love to attach to your summer beads
3 - Lot's of cool popsicle beads! - ice, vanilla, chocolate, cream, strawberry & 4 colored - make a beautiful charm bracelet out of them!

Buy only 1 - and get 2 additional for free!
yes, That's not a mistake :)


Have fun and a great new school year!